
Yes, you can test a golf cart charger yourself using basic tools like a multimeter. Testing a golf cart charger is vital for keeping your cart running well and making sure your batteries get the right charge. If your cart won’t move, or if the batteries drain too fast, the charger is often the first place to look. This guide shows you exactly how to check your charger step-by-step.
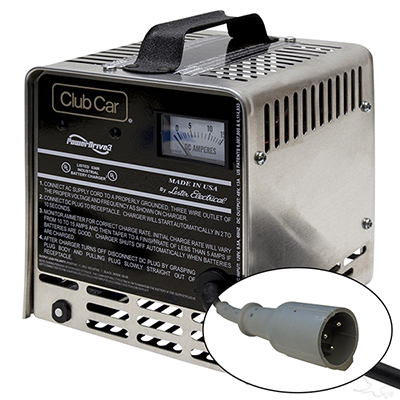
Image Source: jsgolfcarts.com
Why Testing Your Golf Cart Charger Matters
A faulty charger causes many golf cart problems. It might not charge the batteries fully. It could overcharge them, which damages them quickly. Knowing how to perform golf cart charger troubleshooting helps you fix issues fast. This saves you money on new batteries and repairs. It also keeps your downtime low.
Safety First: Preparing for Charger Testing
Electricity is dangerous. Always take safety steps before you start. Never open the charger case unless you are sure you know what you are doing.
Safety Checklist:
- Always unplug the charger from the wall socket.
- Wear safety glasses.
- Keep water away from the charger and batteries.
- If you smell smoke or see sparks, stop immediately.
Tools You Need for Testing
You do not need fancy gear. Most tests use simple tools. Getting the right tools makes testing golf cart charger output much easier.
| Tool | Purpose |
|---|---|
| Multimeter | Measures voltage and current. This is the most important tool. |
| Battery Hydrometer (Optional) | Checks the specific gravity of the battery acid. |
| Jumper Wires/Alligator Clips | Help connect the multimeter probes safely. |
| Voltmeter/Load Tester | Used for more in-depth checks. |
Step 1: Visual Inspection of the Charger and Cables
Start with what you can see. A quick look can spot obvious problems. This is the first part of golf cart charger diagnostics.
Inspecting the Charger Unit
Look closely at the charger body. Are there any cracks? Is the casing hot to the touch when it was running? Check the fan vents. Are they blocked with dirt or dust? A blocked fan causes overheating, which can ruin the charger.
Checking Cables and Connectors
The cables connect the charger to the wall and the cart.
- AC Cord (Wall Side): Look for fraying or cuts on the power cord. A damaged cord is a fire risk.
- DC Cord (Cart Side): Check the plug that goes into the cart. Are the metal pins bent or corroded? Dirty pins cause poor contact and weak charging.
- Indicator Lights: When plugged in, do the lights (like “charging,” “full,” or “fault”) light up correctly? If no lights show up, the charger might not be getting power, or it could have an internal fault.
Step 2: Checking Input Power (Wall Voltage)
The charger needs good power from the wall to work right. You must confirm the input voltage is correct. This checks the power coming into the charger.
- Plug the charger into a working wall outlet.
- Set your multimeter to read AC voltage (VAC). Look for the setting around 200V AC.
- Carefully touch the probes to the two prongs of the charger’s wall plug (if safe to do so, or use an extension cord to test the outlet itself).
- The reading should be near 120V in North America. If the reading is much lower (like 90V), the wall outlet is the problem, not the charger.
If the wall outlet is bad, try another one. If the outlet is fine, move on. This step helps eliminate simple power supply issues in golf cart charger troubleshooting guide.
Step 3: Testing Charger Voltage Output (No Load)
This is a crucial test. You are checking golf cart charger voltage when it is plugged into the cart but not actively charging a very low battery. This is often called the open-circuit voltage test.
Preparation:
- Ensure the charger is plugged into the golf cart’s receptacle.
- Make sure the golf cart tow/run switch is in the “Tow” or “Off” position. This prevents current from flowing back through the cart systems.
- Set your multimeter to read DC voltage (VDC). The range should be higher than the expected voltage (e.g., 50V range for a 48V system).
Testing Procedure:
- Locate the main positive (+) and negative (-) terminals or the main leads coming from the charger plug.
- Connect the red (positive) probe to the positive terminal/wire and the black (negative) probe to the negative terminal/wire.
- Read the voltage displayed on the meter.
Expected Output Voltages (Approximate):
| System Voltage | Expected Open-Circuit Voltage |
|---|---|
| 12V | 14.5V – 16V |
| 24V | 29V – 32V |
| 36V | 43.5V – 48V |
| 48V | 58V – 64V |
If the voltage is zero, significantly low, or erratic, the charger is likely faulty internally. If the voltage is correct, the charger is producing the right voltage, but we need to see if it can hold that voltage under load.
Step 4: Testing Charger Voltage Under Load
A charger might show the correct voltage with no battery connected, but fail when it has to push current. This is testing golf cart charger output under real working conditions.
Note: This test requires the batteries to be connected to the cart. If you suspect your batteries are completely dead, skip this and return after testing golf cart batteries.
- Set the multimeter to DC Voltage (VDC), matching the range needed for your system (e.g., 48V system).
- Turn the golf cart’s tow/run switch to the “Run” position (if your charger requires this for activation—check your manual).
- Plug the charger in. The charger should start cycling, and the indicator lights should show it is actively charging.
- Connect the multimeter probes across the charger output terminals again (red to positive, black to negative).
What to Look For:
The voltage reading should now be higher than the battery’s resting voltage but lower than the open-circuit voltage measured in Step 3. A healthy charger will ramp up the voltage as the battery accepts the charge.
- Signs of a Bad Charger (Under Load):
- The voltage immediately drops significantly below the battery voltage.
- The charger starts, then immediately clicks off and refuses to restart.
- The voltage reading fluctuates wildly.
If the charger engages but the voltage climbs very slowly or never reaches the target charging voltage (usually 2.3 to 2.5 volts per cell for lead-acid), the charger might have a weak transformer or rectifier.
Step 5: Checking Current Draw (Amperage Test)
This test determines if the charger is actually pushing the required amount of current into the batteries. This requires a special tool or careful use of your multimeter.
Warning: Most standard multimeters cannot handle the high amperage drawn by golf cart chargers. Attempting this test with a standard multimeter set to measure current (Amps) can destroy the meter. You usually need a specialized clamp-on DC ammeter for this safely.
If you have the correct high-amperage DC clamp meter:
- Set the clamp meter to the appropriate DC amperage range.
- Clamp the meter around the main positive (or negative) DC wire coming from the charger to the cart.
- Start the charging cycle (Step 4).
- Read the amperage displayed.
A typical 48V charger might push between 10A and 25A initially, depending on the charger’s rating and how depleted the batteries are. If the amperage is zero or very low when it should be charging, you have confirmed a major failure inside the charger unit.
Step 6: Evaluating Battery Health (Prerequisite for Charger Diagnosis)
Before concluding the charger is bad, you must rule out bad batteries. Faulty or mismatched batteries can trick a good charger into thinking the job is done prematurely or prevent it from starting altogether. This relates to testing golf cart batteries.
Simple Voltage Check on Individual Batteries (For Series Systems)
- Set the multimeter to VDC.
- Turn the cart to “Run.”
- Measure the voltage across the two posts of each individual battery.
Target Voltages (Approximate):
- Fully Charged: 2.10V per cell (e.g., 12.6V for a 12V battery).
- Needs Charge: Below 2.05V per cell (e.g., 12.3V for a 12V battery).
If one battery reads significantly lower than all others (e.g., 10V in a 48V system where others read 12.5V), that weak battery is dragging the whole system down. A good charger might stop charging because that weak cell signals a “full” state too soon.
Checking Specific Gravity (The Best Way)
For flooded lead-acid batteries, the hydrometer test is the gold standard. This involves drawing a small sample of electrolyte from each cell and measuring its density.
- Fully Charged: 1.265 or higher.
- Needs Charge: Below 1.225.
If the specific gravity readings across all cells are dramatically different (more than 0.05 variance), the battery bank needs service or replacement, regardless of the charger’s performance.
Step 7: Specialized Diagnostics for Common Charger Issues
Sometimes, the fault is specific to one component within the charger circuitry. This moves into deeper golf cart charger troubleshooting.
Fathom: What if the Charger Won’t Start?
If you plug it in, and nothing happens (no lights, no hum), check these first:
- Wall Power: Re-check Step 2.
- Tow/Run Switch: Many modern chargers require the switch to be in the “Run” position to complete the circuit.
- Safety Interlocks: Inspect the cart’s receptacle. Some chargers have a built-in safety mechanism that checks if the connection is secure before powering up.
- Internal Fuse: Some chargers have an internal fuse on the AC input board. This requires opening the case, which should only be done by experienced technicians. If you suspect this, consider professional service or replacement.
Investigating the Voltage Regulator (For DC Charging Systems)
While most modern chargers are self-contained “smart chargers,” some older or highly specialized systems might interact with the cart’s voltage regulator. The voltage regulator’s main job is to manage the charging system when the engine (or motor in an electric cart) is running. However, in some setups, a failure here can confuse the charger logic.
How to Check the Voltage Regulator (General):
- With the cart running (or key in the “Run” position), test the voltage across the main battery bank terminals.
- The voltage should stabilize within a specific range set by the regulator (e.g., 56V to 59V for a 48V system). If the voltage wildly swings up or down while the key is on, the regulator might be signaling incorrectly to the charger circuit, even if the charger itself is fine.
Identifying Signs of a Bad Golf Cart Charger
Knowing the common signs of bad golf cart charger helps confirm your test results:
- Bulging Batteries: A charger stuck in “bulk” or “absorption” mode will overcharge, causing batteries to swell and leak acid.
- Charger Smells Hot: A burning smell indicates overheating components, often due to a dead fan or failed internal part.
- Charging Takes Too Long: If a deeply discharged battery takes 24 hours to reach “full” when it used to take 10 hours, the charger is not supplying full amperage.
- Charger Clicks Constantly: If the charger cycles rapidly on and off, it usually means it cannot properly detect the battery state of charge.
Step 8: Repairing Golf Cart Charger vs. Replacing
Once diagnostics point to the charger, you face a choice: repair or replace?
Repairing Golf Cart Charger is possible, but complex. Repairs usually involve replacing circuit boards, capacitors, or cooling fans.
When to Consider Repair:
- The fault is clearly external (e.g., a broken cable or bad fuse accessible from the outside).
- You have electronics repair skills and the schematics for your specific charger model.
- The charger is very expensive or specialized (like an industrial unit).
When to Consider Replacement:
- The internal circuit board is damaged (often indicated by dark spots or scorch marks visible if you open the case).
- The charger uses sealed electronics where components are hard to isolate.
- The cost of professional repair nears the cost of a new, modern replacement charger.
Modern “smart chargers” often use microprocessor boards. If these fail, replacement is usually more cost-effective and reliable than complex board-level repair.
Choosing the Right Tester
For serious maintenance, investing in the best golf cart charger testers can speed up the process. While a basic multimeter works for voltage checks, professional testers often include:
- True RMS Metering: For accurate readings on non-perfect AC signals.
- Integrated Load Testing Capability: Devices that can safely simulate a battery load while measuring current output without risking damage to your meter.
Summary of the Testing Workflow
Follow this flow to isolate the problem effectively:
- Safety Check: Unplug everything and inspect cables.
- Input Check: Verify 120V AC power at the wall outlet.
- No-Load Voltage: Check DC voltage output when plugged into the cart (Run switch OFF). Must match specifications.
- Battery Health Check: Test individual battery voltages and specific gravity. Bad batteries ruin charger tests.
- Load Test: Start charging (Run switch ON) and re-check DC output voltage and current (if safe tools are available).
- Conclusion: If power is good, batteries are good, but voltage/current is low under load, the charger needs repair or replacement.
Frequently Asked Questions (FAQ)
Q: How long should my golf cart charger stay on?
A: A healthy charger on a deeply discharged battery should take between 8 and 14 hours to complete a cycle. If it finishes in under 4 hours, the batteries might be weak, or the charger is stopping early. If it runs for over 18 hours, the charger may be weak or the batteries are severely sulfated.
Q: Can I use a regular car battery charger on my golf cart?
A: No. Golf cart batteries (usually 36V, 48V, or 72V) require specific charging profiles and higher voltages than standard 12V car batteries. Using a 12V car charger on a 48V system will not charge it at all.
Q: Why is my golf cart charger humming loudly?
A: A loud hum often means the transformer inside the charger is working hard or vibrating. This can happen when the charger first engages, but if the noise is constant and loud, it suggests potential internal component failure or that the charger is struggling to overcome resistance (often from poor battery connections).
Q: What is the ideal voltage for a fully charged 48V golf cart battery bank?
A: A fully charged 48V lead-acid battery bank should read between 50.8V (resting, after sitting for several hours) and 58V–64V while actively being charged by the charger.
Q: My charger has a green light, but the batteries are not charging. What gives?
A: The green light often signifies that the charger has reached its termination voltage—meaning it thinks the batteries are full. If the batteries are actually low, this points to a faulty sensor or control board inside the charger, or, most commonly, one or more dead cells in the battery bank fooling the sensor. Always test the batteries first.