
Yes, you can charge golf cart batteries individually. Doing so is often necessary when one battery in the pack is failing or when you need to top up a specific battery without overcharging the others.
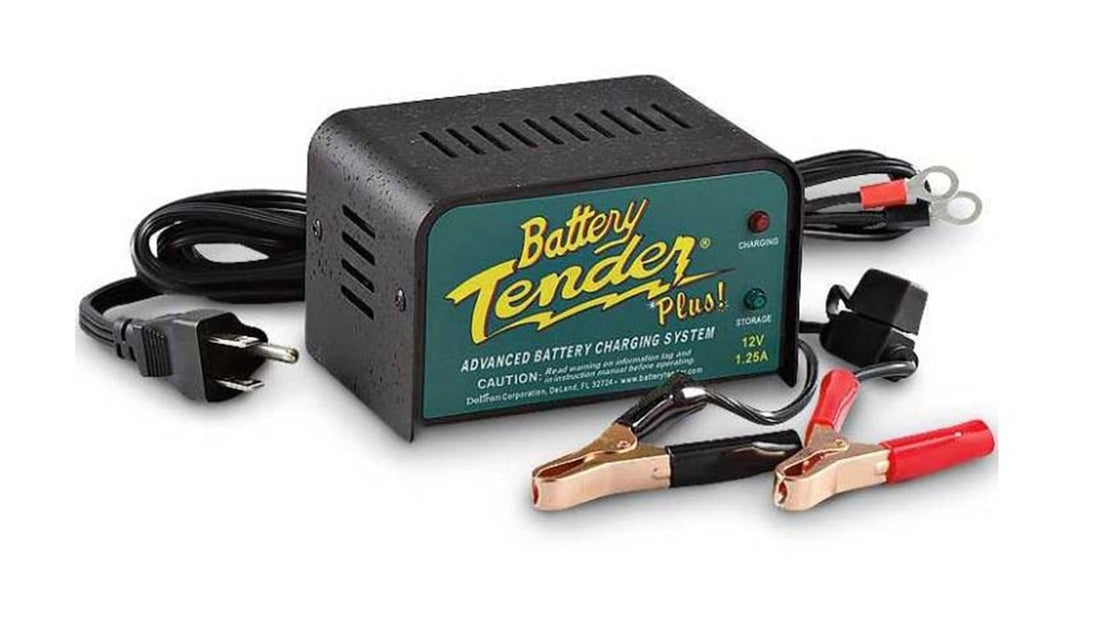
Image Source: cuttingedgegolfcarts.com
Why Charge Golf Cart Batteries Separately?
Most golf carts use a bank of 12-volt batteries wired together. They are usually connected in series to achieve the required voltage (e.g., six 6-volt batteries make a 36-volt system, or eight 6-volt batteries make a 48-volt system). When batteries are linked, the whole bank charges together. However, this setup can mask problems. If one battery weakens, it drags down the performance of the entire set.
Charging golf cart batteries in parallel is often done for initial balancing or testing, but direct charging requires separate connections. Separating them lets you focus on the weakest link. This is especially true when testing golf cart batteries in parallel shows inconsistent readings.
Identifying the Need for Individual Charging
You might need to charge batteries one by one for several reasons:
- A single weak cell: One battery consistently loses charge faster than the rest.
- Uneven wear: Batteries age at different rates due to usage patterns.
- Replacing one battery: If you replace just one battery, the new one must be matched to the state of charge of the older ones.
- Maintenance: Some owners prefer charging flooded lead acid golf cart batteries individually for deep maintenance cycles.
Essential Tools for Separate Battery Charging
To charge batteries one by one, you need tools that allow you to bypass the cart’s main wiring harness. You cannot just plug the main charger into the cart and expect to charge only one battery effectively.
Required Equipment List
| Tool | Purpose | Notes |
|---|---|---|
| Individual Battery Charger | To supply power to one battery at a time. | Must match the voltage (e.g., 12V charger for a 12V battery). |
| Voltmeter or Multimeter | For monitoring voltage of separate golf cart batteries. | Essential for checking charge levels before and after charging. |
| Battery Hydrometer | To check the specific gravity (for flooded batteries). | Shows the true state of charge within the cells. |
| Safety Gear | Gloves, eye protection. | Always protect yourself when handling battery acid and electricity. |
| Jumper Cables or Alligator Clips | To connect the individual charger leads securely. | Ensure clips are insulated and heavy-duty. |
Selecting the Right Charger
The best charger for single golf cart battery maintenance is often a smart, multi-stage charger designed for deep-cycle batteries.
- Maintainer Chargers: These are low-amperage chargers (1 to 4 amps). They are great for slow, safe charging and maintenance.
- Standard Chargers: These charge faster but must be used carefully to avoid overheating the battery when charging 12 volt golf cart batteries separately.
Important Note: Always use a charger rated for the specific voltage of the battery you are charging (e.g., 6V, 8V, or 12V). Using a 12V charger on a 6V battery will destroy it.
Step-by-Step Guide: How to Properly Charge Golf Cart Batteries One by One
This process involves safely disconnecting the batteries and treating each one as a standalone unit for charging purposes. This is key for individual golf cart battery charging methods.
Step 1: Safety First and Preparation
Before touching any terminals, ensure the golf cart is completely off. Set the tow/run switch to the “Tow” position if your cart has one. Put on your safety glasses and gloves.
Step 2: Disconnect the Battery Bank
You must isolate the batteries. This means disconnecting them from each other.
- Locate the main negative cable on the battery bank (usually connected to the controller or main negative post). Disconnect this first.
- Trace the connections: Identify how the batteries are connected (series wiring).
- Disconnect series links: Use a wrench to carefully undo the straps or cables linking one battery to the next. Do this systematically, starting from one end of the bank. Keep the disconnected ends away from metal surfaces to prevent accidental shorts.
- Labeling is crucial: If you are unsure about the wiring, take a picture before you start. Mark the positive and negative posts of each battery if necessary, though standard color coding (red for positive, black for negative) usually applies.
Step 3: Connecting the Individual Charger
Once a battery is isolated, you can treat it as a standalone 12V (or 6V/8V) unit.
- Select the correct charger: Ensure the charger voltage matches the battery voltage.
- Connect the charger leads: Attach the positive lead (usually red) from the charger to the positive terminal of the battery. Attach the negative lead (usually black) from the charger to the negative terminal of the battery.
- Check connections: Make sure the clamps are tight and there is no chance of them slipping off during charging.
Step 4: The Charging Process and Monitoring
This is where best practices for separate golf cart battery charging come into play. Slow and steady charging is usually better than fast charging for deep-cycle batteries.
- Set the Amperage: If your charger has adjustable amperage settings, use a lower setting (like 2 to 10 amps, depending on battery size) for a slower, healthier charge, especially if the battery is deeply discharged.
- Start Charging: Plug in the charger.
- Monitor Initial Heat: After 30 minutes, briefly check the battery. It should feel slightly warm, but not hot. Excessive heat signals that the charge rate is too high or the battery has an internal short.
Step 5: Checking State of Charge
You need objective data to know when to stop charging each battery.
- Using a Voltmeter: Regularly check the voltage across the terminals while the battery is disconnected from the charger (allow a 30-minute surface charge to dissipate).
- 12.6V to 12.8V: Fully charged (100% SOC)
- 12.4V: About 75% charged
- 12.0V: About 50% charged
- For Flooded Batteries (Hydrometer Use): For charging flooded lead acid golf cart batteries individually, use a hydrometer. A specific gravity reading of 1.265 or higher across all cells indicates a full charge.
Step 6: Equalizing Charge (Optional but Recommended)
If you are performing deep maintenance, an equalizing charge for individual golf cart batteries can help break down sulfation.
- An equalization charge applies a controlled, slightly higher voltage for a set period (usually an hour or two after reaching full charge).
- Caution: This is generally safe for flooded batteries but should generally be avoided for sealed AGM or Gel batteries unless the charger has a specific, programmed equalization mode.
Step 7: Reassembly
Once all batteries have reached the desired voltage (and specific gravity, if applicable):
- Disconnect the individual chargers.
- Clean any corrosion off the terminals.
- Reconnect the batteries in their original series configuration.
- Reconnect the main negative cable last.
- Test the cart to ensure all batteries are now performing uniformly.
Specific Scenarios for Individual Charging
Different battery types and system setups require slightly different approaches to charging 12 volt golf cart batteries separately.
Charging 12 Volt Batteries in a 48V System
If your 48V cart uses four 12V batteries, isolating and charging them individually is very straightforward. Each battery is already 12V, so you simply need a standard 12V smart charger.
Dealing with 6-Volt and 8-Volt Batteries
If your system uses 6V or 8V batteries (common in older or heavy-duty carts), you must use a charger that outputs the correct voltage, or use a 12V charger with a specific low-voltage setting, although dedicated chargers are safer.
| Battery Voltage | Typical System Voltage (Example) | Required Charger Voltage |
|---|---|---|
| 6 Volts | 36 Volts (Six 6V batteries) | 6 Volts DC |
| 8 Volts | 48 Volts (Six 8V batteries) | 8 Volts DC |
| 12 Volts | 48 Volts (Four 12V batteries) | 12 Volts DC |
Best Practices for Maintaining Battery Health
Good habits prevent the need for constant individual charging.
- Top Off Water Levels: If you have flooded batteries, check the water level weekly and top off with distilled water before charging (never after, unless topping off after an equalization charge).
- Avoid Deep Cycling: Try to charge your batteries when they reach about 50% depth of discharge (around 12.2V for a 12V battery).
- Use the Right Charger: Using the cart’s standard onboard charger is fine for regular use, but for maintenance, an individual charger allows for better control.
Troubleshooting Individual Golf Cart Battery Charging Issues
Sometimes, even when charging separately, you run into problems. Troubleshooting individual golf cart battery charging issues usually centers on the battery itself or the connection quality.
Problem 1: Battery Won’t Accept a Charge
If you connect the individual charger, and the voltage doesn’t rise after several hours, the battery might be “dead” or heavily sulfated.
- Check Connections: Re-verify that the charger leads are firmly attached to the correct terminals.
- Test for Shorts: If the charger immediately goes into “full” mode or gets excessively hot, the battery may have an internal short. You can try a very low amperage “pulse charge” for a short time, but heavily shorted batteries need replacement.
Problem 2: Battery Heats Up Rapidly
Rapid heating means excessive current flow, often caused by high internal resistance or incorrect voltage settings.
- Verify Charger Voltage: Ensure you are not using a 12V charger on a 6V battery.
- Reduce Amperage: If the battery is warm, switch to a lower amperage setting on your charger. High heat damages the internal plates.
Problem 3: Inconsistent Readings After Charging
If you notice that after charging everything individually, the cart still runs poorly, you need to go back to monitoring voltage of separate golf cart batteries while they sit idle.
- The Load Test: Voltage readings only show the surface charge. A true test requires a load test. If a battery instantly drops voltage under a small load, it is weak, regardless of how it read when disconnected from the individual charger.
Advanced Technique: Balancing Through Individual Charging
A major benefit of how to properly charge golf cart batteries one by one is the ability to balance the bank. Batteries in series are forced to operate at the level of the weakest link. By individually charging each battery to a precise 12.8V (or equivalent), you ensure they all start at the same potential energy level when reconnected. This process is often called “balancing.”
If you frequently notice one battery dropping faster than the others, dedicated individual charging sessions can reset that battery’s state, often extending its life. This is superior to relying solely on the cart’s internal charger, which often stops charging once the bank reaches peak voltage, leaving slightly lower batteries behind.
Frequently Asked Questions (FAQ)
Q: Can I charge my golf cart batteries while they are still connected together?
A: You can use your standard golf cart charger while they are connected. However, this method charges the entire bank simultaneously and does not allow you to isolate and treat a single weak battery. For true individual attention, you must disconnect them.
Q: Is it safe to charge batteries individually if they are different ages?
A: It is generally safe to charge them individually if they are the same type (e.g., all flooded lead-acid). However, charging a brand-new battery alongside a very old, degraded one is not ideal long-term. The old battery will still limit overall performance. If one battery is failing significantly, it should be replaced even if it charges up fine during individual sessions.
Q: Does individual charging speed up the overall charging time?
A: Not necessarily. If you use a slow, dedicated maintenance charger for each battery one after the other, it will take much longer than using the high-amperage onboard charger on the whole bank. The trade-off is quality and precision over speed.
Q: What is the correct way to reconnect batteries after individual charging?
A: Always follow the series circuit diagram for your specific cart voltage (36V, 48V, etc.). Typically, you connect the positive terminal of Battery 1 to the negative terminal of Battery 2, the positive of Battery 2 to the negative of Battery 3, and so on. The remaining open positive terminal (Battery 1’s positive) is the main positive lead for the cart, and the remaining open negative terminal (the last battery’s negative) is the main negative lead. Always connect the final main negative cable last.