
Can you cut plexiglass with a circular saw? Yes, you absolutely can cut plexiglass with a circular saw, but it requires the right tools and careful technique to avoid cracks and melting. This method is efficient for large sheets.
Plexiglass, also known as acrylic, is a strong plastic. It looks like glass but is much tougher. Cutting it cleanly needs special attention. If you rush or use the wrong blade, the plastic can shatter. It can also melt, leaving a messy edge. This guide will show you how to get clean, professional results Plexiglass cutting circular saw.
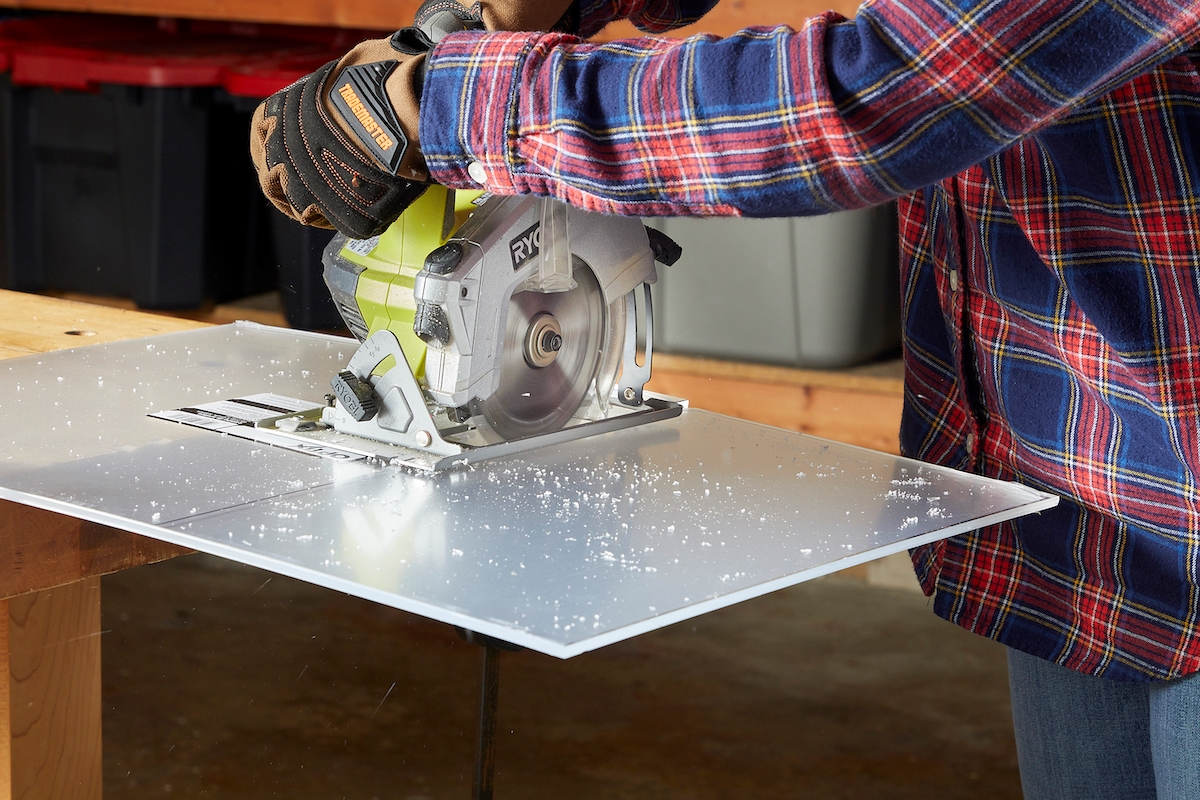
Image Source: www.bobvila.com
Why Use a Circular Saw for Plexiglass?
Using a circular saw for thick or long sheets of plastic is often the best choice. Hand tools are slow for big jobs. Other power tools might cause too much heat. A circular saw, when set up correctly, offers speed and straight lines for large acrylic sheet cutting with circular saw projects.
Comparing Tools
It’s good to know why a circular saw wins for certain tasks.
| Tool | Best For | Main Challenge |
|---|---|---|
| Circular Saw | Thick sheets, long cuts | Heat generation, chipping |
| Jigsaw | Curves, small pieces | Slower speed, less straight lines |
| Table Saw | Very long, perfect straight cuts | Setup time, blade exposure |
| Hand Saw | Very thin sheets, small repairs | Slow speed, arm fatigue |
Preparing for the Cut
Proper setup is half the battle when cutting plastic sheets with a circular saw. Skipping these steps leads to poor results.
Safety First
Always put safety first. Acrylic dust is light and can irritate your lungs.
- Wear safety glasses or goggles. Flying plastic chips hurt eyes.
- Wear a dust mask or respirator.
- Keep hands away from the spinning blade.
- Use hearing protection. Saws are loud.
Choosing the Right Blade: The Key to Success
The best blade for cutting plexiglass with saw is crucial. A standard wood blade will likely cause melting and chipping. You need a blade designed to cut plastic cleanly.
Look for blades with:
- High Tooth Count: More teeth mean smaller chips and a smoother cut. Aim for 60 to 100 teeth for a 7-1/4 inch blade.
- Triple Chip Grind (TCG) or High Alternate Top Bevel (Hi-ATB): These tooth geometries help shear the plastic rather than crush it. This reduces heat buildup.
- Thin Kerf: A thin blade removes less material, which means less friction and less heat.
Never use a dull blade. A dull blade forces the saw to work harder, creating heat and ruining the cut.
Setting Up the Circular Saw
Correct circular saw settings for acrylic make a huge difference in preventing cracks. Heat is the main enemy when preventing melting when cutting acrylic with circular saw.
Speed Setting
You need high speed, but not the highest possible speed. Too slow equals melting. Too fast risks chipping.
- If your saw has variable speed control, set it to a medium-high setting (around 4,000 to 5,000 RPM).
- If your saw is fixed speed, use it, but compensate with feed rate (move slower).
Blade Depth Adjustment
Set the blade depth carefully. The blade should only stick out about 1/8 to 1/4 inch below the material. This minimizes the amount of blade exposed to the air, reducing wobble and vibration. Less vibration equals fewer stress points on the plastic.
Work Surface Preparation
Plexiglass needs firm support. If the sheet flexes during the cut, it will crack.
- Support Fully: Lay the plexiglass on a large, flat surface, like sawhorses or a sturdy workbench.
- Use Sacrificial Material: Place a sheet of inexpensive plywood or MDF underneath the entire area to be cut. This supports the plastic completely and prevents tear-out on the bottom edge.
- Clamping: Secure the plexiglass firmly to the support surface. Use clamps every 12 to 18 inches along the cut line. The sheet must not move during the cut.
Achieving Smooth Cuts in Plexiglass
To get smooth cuts in plexiglass with circular saw, you must control friction and tear-out.
Scoring the Surface (Optional but Recommended)
For the absolute best finish, consider scoring plexiglass before circular saw cut. Scoring creates a shallow groove that guides the blade and helps prevent chipping on the top surface.
- Use a sharp utility knife or a specialized plastic scoring tool.
- Place painter’s tape along your cut line.
- Lightly score the protective film and the top layer of the acrylic along the line. Do not press too hard; you just need a shallow guide mark.
Using a Guide System
Straight cuts are hard to achieve freehand, especially with a plastic sheet. A circular saw guide for plexiglass is essential for accuracy.
- Commercial Guides: Some jigs are made specifically for guiding saws.
- DIY Straight Edge: Use a long, perfectly straight piece of wood or aluminum angle iron.
- Setting the Offset: Measure the distance from the edge of your saw base plate to the blade. Use this measurement to position your guide fence parallel to your desired cut line, ensuring the blade hits exactly where you marked. Clamp the guide securely.
Controlling the Feed Rate
This is where many people fail when using a circular saw on polycarbonate or acrylic.
- Go Slow and Steady: Feed the saw slowly into the material. Do not force the saw. Let the sharp teeth do the work.
- Constant Pressure: Maintain consistent, gentle pressure throughout the cut. Pauses or changes in speed cause burning or chipping.
- Listen and Watch: If you see smoke or smell melting plastic, you are feeding too fast, or your blade is dull. Immediately back off the speed.
Cooling the Cut
To actively combat heat build-up and help with preventing melting when cutting acrylic with circular saw, use a cooling agent.
- Water Spray: If possible and safe for your environment, a very light, constant mist of water sprayed just ahead of the blade can drastically reduce heat. Be careful not to let water pool on the surface where it might wick under the saw base.
- Air: A shop vacuum running next to the cut line can pull hot air and dust away from the blade contact point.
Specialized Considerations for Different Plastics
While we focus on plexiglass (acrylic), you might also work with other plastics like polycarbonate. Using a circular saw on polycarbonate is similar but needs even more care. Polycarbonate is tougher but melts even more easily than acrylic. Use the exact same slow feed rate and high-tooth blade.
Working with Protective Film
Plexiglass sheets usually come with a protective paper or plastic film on both sides.
- Keep it On: Keep the film on during cutting. It helps hold small edge pieces together and reduces surface scratching.
- Tape Over Cuts: Place long strips of masking tape or painter’s tape across your intended cut line, especially on the top surface. This holds the film down and prevents the edge from chipping out when the saw exits the material.
Post-Cut Finishing
Once the cut is done, some clean-up is usually necessary.
Removing Burrs
Even with the best technique, you might have small plastic burrs on the edges.
- Scraping: Use a sharp plastic scraper or a small block of wood with coarse sandpaper wrapped around it. Gently scrape away the rough edges.
- Sanding: For a very fine finish, start with 220-grit sandpaper and move up to 400 or 600-grit. Always sand the edges wet (wet sanding) for the best clarity.
Flame Polishing (For Crystal Clear Edges)
If you need the edge to look exactly like untouched acrylic, you can flame polish. This requires skill and extreme caution.
- Use a small propane or MAPP gas torch.
- Keep the flame moving constantly across the edge.
- The goal is just to heat the surface until it flows, not to burn the plastic. This process instantly clears up any haziness left by sawing.
Troubleshooting Common Circular Saw Cutting Issues
When Plexiglass cutting circular saw, you might run into problems. Here is how to fix them.
Issue 1: Melting or Gumming Up
Cause: Blade friction is too high. This means the blade is dull, you are feeding too fast, or the blade speed is too low.
Fix: Sharpen or replace the blade. Slow down your feed rate significantly. Ensure the saw is running at its maximum safe speed for the blade size.
Issue 2: Cracking or Chipping (Tear-Out)
Cause: Insufficient support or vibration. The plastic is flexing under the blade pressure, or the blade teeth are too aggressive (low tooth count).
Fix: Clamp the workpiece down harder. Add more support underneath. Check if your blade has enough teeth. If using a rougher blade, score the line deeply first.
Issue 3: Uneven or Wavy Cut
Cause: Improper use of the circular saw guide for plexiglass or pushing the saw sideways during the cut.
Fix: Re-check your guide setup for accuracy and tightness. Concentrate on keeping the saw base pressed firmly against the guide fence throughout the entire pass.
Summary of Best Practices Table
| Step | Key Action for Success | Impact on Cut Quality |
|---|---|---|
| Blade Selection | High tooth count (60T+), TCG geometry | Reduces melting and chipping |
| Speed Setting | Medium-High RPM (4k-5k) | Balances speed and heat control |
| Feed Rate | Slow and consistent pressure | Prevents forcing the material |
| Support | Full under-support with sacrificial board | Stops flex and cracking |
| Guidance | Use a solid guide fence | Ensures perfectly straight lines |
Fathoming the Physics of Plastic Cutting
When you cut wood, the saw teeth essentially tear away fibers. When cutting plastic sheets with a circular saw, the material is thermoplastic. It softens when heated.
If the friction from sawing generates heat faster than the material can dissipate it, the plastic melts. This molten plastic sticks to the teeth of the blade (called “gumming up”). This sticky residue increases friction further, causing more melting. This feedback loop leads to a terrible finish and makes the saw drag heavily.
High tooth counts reduce the surface area contact time for each tooth. This means each tooth removes a small amount of material, allowing the heat to disperse better before the next tooth hits. This is vital for smooth cuts in plexiglass with circular saw.
For polycarbonate, the material is more flexible. Any vibration introduced by a loose saw or unsupported sheet will transfer into cracks. Therefore, supporting the material perfectly flat and using a smooth, consistent feed is even more critical when using a circular saw on polycarbonate.
Frequently Asked Questions (FAQ)
Q: Do I need to bevel the blade when cutting plexiglass?
A: No, for standard straight cuts, keep the blade perfectly perpendicular (90 degrees) to the sheet. Beveling is only sometimes used for specialized edge work, not standard thickness cuts.
Q: How thick of plexiglass can a standard circular saw handle?
A: A standard 7-1/4 inch circular saw can usually handle up to 1/2 inch thick acrylic if you use the correct high-tooth blade and slow feed rate. Thicker sheets (3/4 inch and up) are better suited for table saws or specialized panel saws, but careful technique can push the limits of the circular saw.
Q: Can I cut colored or mirrored plexiglass differently?
A: Mirrored or tinted acrylics often have a very thin metallic coating. This coating can chip easily. Always use painter’s tape over the mirrored side and try to make the first (top) pass through the mirror side very slow to avoid flaking the finish.
Q: What if I don’t have a TCG blade? What’s the next best thing?
A: If you cannot find a TCG or Hi-ATB blade, use the highest tooth count blade you can find, preferably one rated for non-ferrous metals or plastic, ensuring it has carbide tips. A 60-tooth count is the absolute minimum for good results.
Q: Is it better to cut from the top or bottom of the plexiglass first?
A: It is generally recommended to cut from the side where you want the cleanest final edge. For most projects, you want the top surface to be perfect. However, because the blade rotation pulls material up into the saw table, you often get better support and less top chip-out by making your first pass from the bottom side (the side resting on the sacrificial board) if your blade is angled correctly, or by scoring the top side deeply first. Always prioritize keeping the final visible surface clean.