
Can I charge a golf cart battery without a specific charger? No, you absolutely should not charge a golf cart battery with a standard car charger; using the correct golf cart battery charger is vital for safety and battery health.
Charging your golf cart batteries correctly is key. Good charging habits keep your batteries running long. They also save you money on replacements. This guide shows you the simple steps. We will also look at the best ways to keep your batteries healthy for years.
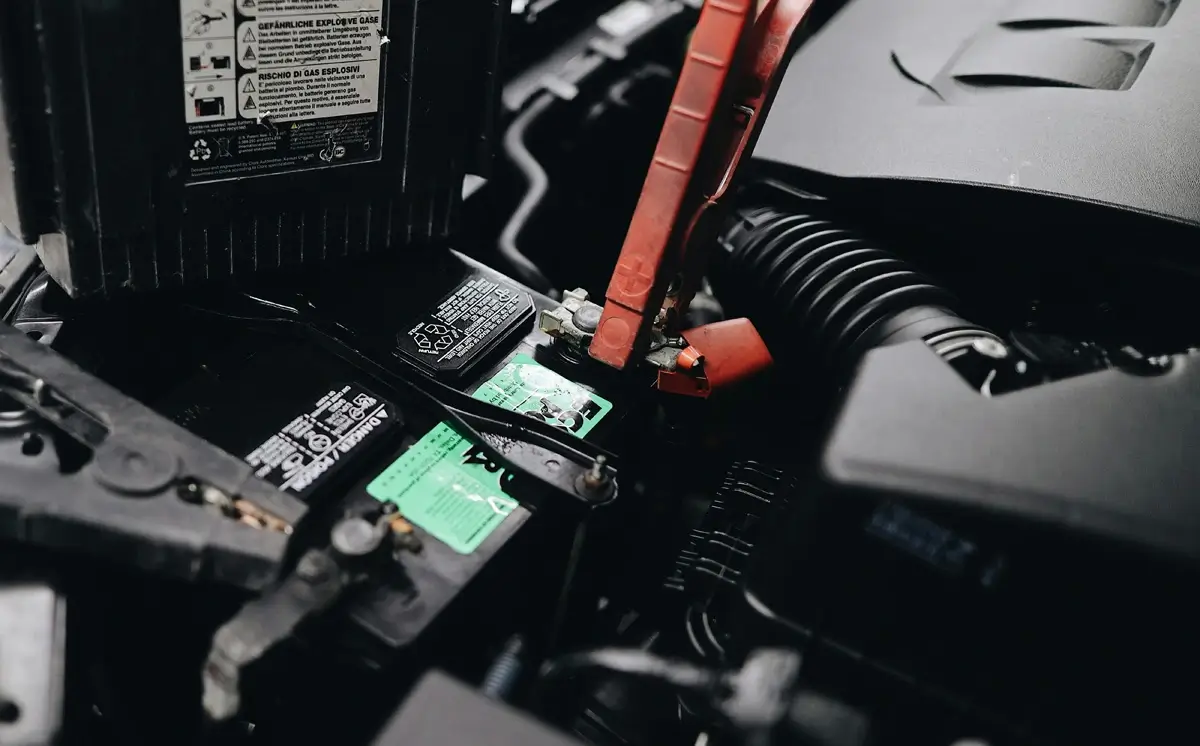
Image Source: centralcoastcarts.com
Why Proper Charging Matters for Your Cart
Golf cart batteries are special. They are usually deep cycle types. This means they handle being drained down low and then filled back up many times. Car batteries are for starting engines, not deep draining. Using the wrong charger or method can hurt them fast.
Deciphering Battery Types
Golf carts use different battery chemistries. Knowing yours helps you charge right.
| Battery Type | Key Feature | Charging Notes |
|---|---|---|
| Flooded Lead-Acid (Wet Cell) | Needs water added. Has removable caps. | Requires careful monitoring of water levels. |
| Sealed Lead-Acid (AGM/Gel) | Maintenance-free. No water needed. | More sensitive to overcharging. |
Charging flooded vs sealed golf cart batteries requires slight differences in routine. Flooded batteries need water checks. Sealed batteries need careful voltage control.
Choosing the Right Charger
The golf cart battery charger selection is the first big step. Using the wrong charger can damage your pack.
Key Charger Features
Look for chargers made just for golf carts. They must match your voltage (usually 12V, 36V, or 48V).
- Automatic Shutoff: This is crucial. A good charger stops when the battery is full. This prevents overcharging damage.
- Multi-Stage Charging: Modern chargers use stages. They push current hard at first. Then they taper off to finish the charge slowly. This is the best way to charge golf cart batteries.
- Compatibility: Ensure the charger matches your battery chemistry (AGM, Gel, or Flooded).
The Role of the Maintainer
A golf cart battery maintainer use is a great option for stored carts. Maintainers provide a slow, trickle charge. They keep the battery topped up without overdoing it. They are perfect for off-seasons. This helps in optimizing golf cart battery lifespan through charging.
Step-by-Step Guide to Charging Your Golf Cart Batteries
Follow these steps for safe and effective charging. Safety first! Batteries produce explosive hydrogen gas while charging.
Step 1: Safety Check First
Always charge in a dry, open, and cool place.
- Wear safety glasses and gloves.
- Make sure the area has good airflow.
- Never smoke or create sparks near the batteries.
- Turn the golf cart key switch to the “OFF” position.
Step 2: Inspect the Batteries (Flooded Types Only)
If you have flooded vs sealed golf cart batteries, you must check the water.
- If the caps are removable, take them off.
- Check the fluid level. The plates must be covered by at least 1/8 inch of electrolyte (battery acid/water mix).
- Add only distilled water if levels are low. Never overfill. Do this before charging.
Step 3: Connect the Charger
Connect the charger cable clamps securely.
- Connect the Positive (+) clamp (usually red) to the battery’s positive terminal.
- Connect the Negative (-) clamp (usually black) to the battery’s negative terminal.
- Note: For carts with a single large pack (like a 48V system), connect to the main terminals of the entire pack, following the charger manual.
Step 4: Plug It In and Start Charging
Plug the charger into a standard wall outlet.
- Turn the charger on, if it doesn’t start automatically.
- The charger light should indicate it is actively charging.
- If nothing happens, check all connections and the power outlet.
Step 5: Monitoring the Charge Cycle
How long to charge golf cart batteries varies. It depends on how drained they are.
- Never interrupt a full charge cycle. Let the automatic charger finish its job.
- For heavily depleted batteries, charging can take 10 to 14 hours.
- If the charger light says “full” very quickly, this is a sign of a problem. It might be a bad cell or a weak charger.
Step 6: Disconnecting the Charger Safely
Once the charger signals it is complete (usually a green light or an auto-shutoff):
- Unplug the charger from the wall outlet first.
- Then, disconnect the negative (-) clamp.
- Finally, disconnect the positive (+) clamp.
Step 7: Post-Charge Inspection (Flooded Batteries)
Wait about an hour after charging stops.
- Check the water levels in flooded batteries again. Charging causes water loss. Top off with distilled water if needed. Do not add water until after the charge cycle is complete.
Fathoming Charging Voltage Requirements
The golf cart battery charging voltage is critical for efficient charging. Voltage dictates how much “push” the charger gives the battery.
- 12-Volt Battery: Needs a charging voltage of about 14.4V to 14.8V to fully charge.
- 48-Volt System (8 x 6V batteries or 4 x 12V batteries): Needs a final charging voltage near 58V to 60V.
Modern multi-stage chargers handle this automatically. They deliver high voltage to start, then slowly drop the current as the battery nears 100%. This is vital for deep cycle golf cart battery charging.
Golf Cart Battery Charging Tips for Longevity
Good charging habits add years to your battery life. Follow these golf cart battery charging tips.
Avoid Deep Discharges
The biggest killer of deep cycle batteries is draining them too low, too often.
- Try to keep the State of Charge (SOC) above 50%.
- If you drain them below 50% regularly, you cut their lifespan significantly.
Never Leave Them Dead
Do not leave a discharged battery sitting around. Sulfation builds up quickly when lead-acid batteries sit empty. This hard buildup ruins battery capacity. Charge the cart right after a long day of use.
Equalization Charging
Flooded lead-acid batteries benefit from an occasional equalization charge. This is an intentional overcharge at a controlled, low current.
- Purpose: It helps mix the electrolyte solution and can remove mild sulfation.
- Frequency: Once a month, or every 30 charge cycles, is often recommended.
- Caution: Only do this if your charger has an “Equalize” setting, or if you use a highly manual process while watching water levels closely. Sealed batteries should never be equalized unless specified by the manufacturer.
Temperature Matters
Batteries charge differently in the heat or cold.
- Cold Weather: Batteries need a slightly higher voltage to charge fully.
- Hot Weather: High temperatures speed up wear. Always charge in a cool spot.
Troubleshooting Golf Cart Battery Charging Issues
Sometimes, charging doesn’t go as planned. Here is how to deal with common problems.
Problem 1: Charger Does Not Turn On
- Check the Wall Outlet: Plug a lamp or other device into the outlet. Is it working?
- Check the Connection: Are the clamps tight on the battery posts? Loose connections stop the circuit.
- Safety Fuse: Some chargers have an inline fuse. Check if it is blown.
Problem 2: Charger Runs for a Very Short Time
If the charger goes from “Charging” to “Full” in just an hour or two, it is not truly charging the pack.
- Weak Batteries: If one battery in the series is dead or shorted, it stops the entire pack from charging correctly. Test individual battery voltage.
- Charger Fault: The charger might think the battery is full too soon due to a faulty sensor.
Problem 3: Batteries Get Very Hot While Charging
Excessive heat is dangerous. It means the battery is being overcharged or has an internal short.
- Immediate Action: Unplug the charger right away.
- Investigation: Check the golf cart battery charging voltage if you can measure it. If the voltage is much too high (e.g., over 15V on a 12V battery), the charger is faulty. If the voltage seems normal but the battery is hot, it likely has an internal issue and needs replacement.
Problem 4: Water Boiling or Excessive Gassing
This is severe overcharging. Hydrogen gas smells sharp and is explosive.
- If this happens, unplug the charger immediately.
- This is common if you use a charger not designed for deep cycle golf cart battery charging or if an automatic charger fails.
Optimizing Golf Cart Battery Lifespan Through Charging
The goal isn’t just getting power; it’s keeping the power source healthy. These steps maximize your investment.
Use the Right Amperage
The charge rate (amperage) matters. Too high a rate can damage the plates.
- A general rule is to charge at a rate of 10% of the battery’s Amp Hour (AH) rating.
- Example: A 100AH battery should ideally be charged with a 10A charger.
- Most modern chargers adjust automatically, but if buying a manual charger, watch the amperage.
Seasonal Storage Charging
If you store your cart for the winter or long periods:
- Charge the batteries fully before storage.
- Clean any corrosion from the terminals.
- Use a maintenance charger or golf cart battery maintainer use during storage. This keeps them near full charge, which is the safest state for long-term storage. Never store them dead.
Keep Terminals Clean
Corrosion (the white or blue fuzzy stuff) acts like insulation. It stops the charger from getting a good connection to the battery.
- Clean terminals regularly using a wire brush and a baking soda/water mix.
- Apply a thin layer of dielectric grease or petroleum jelly after cleaning to prevent future buildup.
Comparing Charging Flooded vs. Sealed Batteries
While the basic process is similar, the key differences lie in monitoring and final stages.
| Feature | Flooded (Wet Cell) | Sealed (AGM/Gel) |
|---|---|---|
| Water Level | Must check before and after charging. | Never check or add water. |
| Gassing/Heat | Tolerates more gassing during the final stages. | Highly sensitive to heat and overcharging. |
| Equalization | Recommended periodically to maintain health. | Generally not recommended; can cause permanent damage. |
| Voltage Sensitivity | Slightly more forgiving of minor voltage variances. | Requires very precise golf cart battery charging voltage control. |
For sealed batteries, finding a charger specifically labeled for Gel or AGM is the best way to charge golf cart batteries of this type.
Frequently Asked Questions (FAQ)
Q: Can I charge my golf cart batteries overnight safely?
A: Yes, with a modern, automatic charger. These chargers are designed to taper off the current and switch to a float charge once full, making overnight charging safe. Always ensure the charger has an auto-shutoff feature.
Q: What happens if I charge my golf cart batteries too long?
A: Overcharging boils the electrolyte (water out of the acid) in flooded batteries, potentially exposing the plates and causing premature failure. For sealed batteries, overcharging causes internal pressure buildup and irreparable damage. This is why golf cart battery charging tips stress using automatic chargers.
Q: Is it okay to mix different voltage batteries in my cart while charging the pack?
A: Absolutely not. All batteries in a series must be the same voltage (e.g., all 6V or all 12V) and ideally the same age and brand. Mixing voltages will destroy the weaker battery quickly and prevent the entire pack from reaching full charge.
Q: How do I know if my charger is working correctly?
A: A functional charger will show a steady current draw for several hours and then taper off. If it indicates “Full” immediately, or if the batteries remain cold after many hours of charging, the charger may be malfunctioning or the batteries may be beyond saving. You can use a multimeter to check the golf cart battery charging voltage during the process.
Q: What is the best practice for daily use charging?
A: Charge your cart every time you use it, even if you only drove a short distance. For deep cycle golf cart battery charging, frequent, shallow charges are better than letting them drain deeply between charges.