
A flaring tool is used to create a flared, bell-shaped end on the tip of a piece of tubing. This specialized shape allows the tubing to connect tightly with a matching fitting, creating a secure, leak-free seal.
Flaring tools are vital pieces of equipment across many trades. They are fundamental refrigeration tools and essential HVAC tools. Mechanics, plumbers, and HVAC technicians rely on them daily. You will often see these tools used when working with copper tubing and brass tubing. The process helps join two sections of pipe or connect a pipe to a valve or gauge.
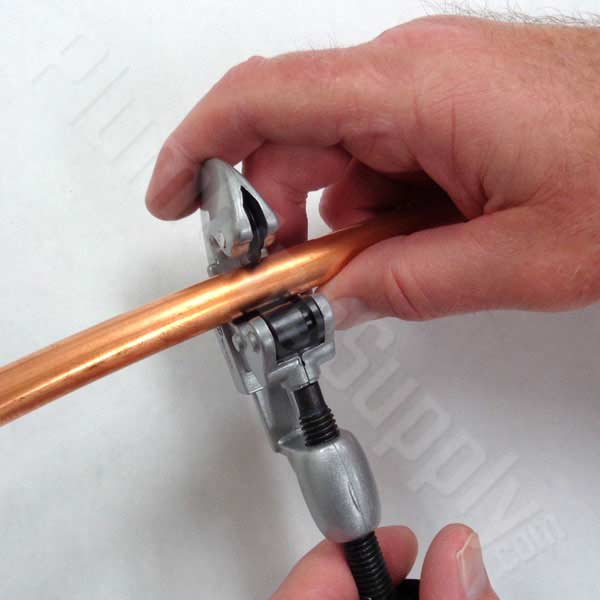
Image Source: www.plumbingsupply.com
The Core Purpose: Making a Strong Seal
The main job of a flaring tool is simple: to prepare pipe ends for joining. When you flare a tube, you widen the opening. This wider end sits perfectly against a fitting. A special nut, often called a flare nut wrench used later, then tightens down on this flared edge. This action locks the connection tight. This tight fit stops fluids or gases from leaking out.
Leaks in pressurized systems, like air conditioning or plumbing, can cause big problems. They waste energy, cause system failure, or create safety hazards. The flare connection offers a strong mechanical seal that resists vibration and pressure changes better than many other joint types.
Types of Tube Ends Created with Flaring Tools
There are a few main ways a flaring tool shapes a tube end. The type of flare needed depends on the job and the system pressure.
Single Flaring
Single flaring is the most basic method. The tool pushes the end of the tube outward into a simple 45-degree cone shape.
- This is common for lower-pressure applications.
- It is often used in basic plumbing or some low-pressure gas lines.
- It is fast to make but might not hold up well under very high pressure or heavy vibration.
Double Flaring
Double flaring creates a much stronger seal. This method is mandatory for many high-pressure systems, especially in HVAC and refrigeration.
- First, a small inward flare is made.
- Then, the tool rolls the edge outward again, essentially creating a double fold or lip.
- This double layer of metal provides much greater sealing surface area.
- It resists cracking and leaks far better than a single flare. This is often the standard for refrigerant lines.
How a Flaring Tool Works: The Mechanics
A typical flaring tool kit has several key parts that work together to shape the metal. While designs vary, most follow the same basic mechanical steps.
Components of a Standard Flaring Set
| Component Name | Primary Function |
|---|---|
| Yoke or Frame | This holds the main pressure mechanism. |
| Flaring Cone (or Die) | This is the piece that forces the metal outward into the flare shape. |
| Tube Clamps (or Blocks) | These hold the tubing steady and set how far the tube sticks out. |
| Screw Mechanism | This drives the cone into the tube end with great force. |
The Step-by-Step Process
To successfully make a flare, you must follow a strict order. Accuracy here is key for a good seal.
- Prep the Tube: The first step involves cleaning the end of the copper tubing or brass tubing. Any burrs (sharp edges) inside or outside the tube must be removed using a reamer or file. Smooth edges prevent the tube from splitting during the flaring process.
- Measure and Clamp: You must measure how much tubing sticks out past the clamp block. This measurement is critical. Too little stick-out means the flare won’t form correctly. Too much means the flare will be too large or weak. The tube is then tightly clamped in the block.
- Attach the Flaring Cone: The flaring cone is placed on top of the tube end, sitting inside the hole of the clamp block.
- Apply Pressure: The main screw mechanism on the yoke is tightened down. This forces the cone deeply into the soft metal of the tube end. The metal is forced to conform to the shape of the cone, creating the flare.
- Release and Inspect: Once the flare is formed, the pressure is released, and the tube is removed. The resulting flare must look smooth, round, and free of cracks or wrinkles.
If you are making a double flaring setup, the process requires two separate pressing stages to achieve that extra-strong lip.
Why Flaring is Preferred Over Other Connections
Why not just use solder, compression fittings, or welding for joining pipes? Flaring offers specific advantages, especially in temperature-controlled environments.
Resistance to Vibration and Movement
Systems like air conditioners and refrigerators often vibrate. Soldered joints can crack under constant shaking. Compression fittings can slowly loosen over time. Flared joints, because they create a metal-to-metal seal mechanically locked by a nut, hold up much better against these stresses. This reliability makes them a top choice for professionals using HVAC tools.
Ease of Disassembly and Reassembly
Unlike soldering, which requires heat and cleaning every time, a flared connection can be easily taken apart using a flare nut wrench and put back together. This is very helpful during system maintenance or when tube expanding is needed nearby.
No Heat Required (Usually)
For many applications, flaring avoids the need for a torch. This is safer, especially when working near flammable materials or inside confined spaces. The work relies on mechanical force, not heat fusion.
Tool Selection: Choosing the Right Flaring Tool
Not all flaring tools are the same. Selecting the right one affects the quality of your work and how much time you spend. Professionals often carry a variety of flaring kits.
Flare Nut Wrenches vs. Standard Wrenches
When dealing with flared connections, you need a specialized wrench. A standard open-end wrench can easily slip off the hex shape of the flare nut, rounding the corners. A flare nut wrench is designed with a closed loop that grabs the nut on all sides. This ensures you can apply maximum torque without stripping the nut, which is essential for achieving the final tight seal.
Types of Flaring Tool Kits
- Standard (Screw Type) Kits: These are the most common, often sold in sets for different tubing sizes. They require manual effort to turn the screw. They are very reliable for flaring practice and regular use.
- Quick-Action Yoke Kits: These use a fast-action ratchet or screw that speeds up the tightening process. They save time, which is important on job sites.
- Tubing Expanders: While not strictly a flaring tool, tube expanding tools are closely related. They are used to slightly increase the diameter of one tube end so it can slide over another tube for soldering or brazing, often when flaring is not the preferred method. Flaring tools work on the outside diameter (OD) for sealing; tube expanders work on the inside diameter (ID) for telescoping fits.
Material Matters: Tubing Compatibility
The material of the pipe heavily influences how easily and effectively a flare can be made.
Copper Tubing
Copper tubing is the most common material worked with a flaring tool. Copper is soft and ductile (easily shaped without breaking). This makes it ideal for forming clean, tight flares for general plumbing and HVAC lines carrying refrigerants like R-410A.
Brass Tubing
Brass tubing is also used, particularly in older systems or specific gas applications. Brass is slightly harder than copper but still malleable enough for good flaring results when the right pressure is applied.
Steel Tubing
Steel tubing is rarely flared using standard hand tools. It is too hard. Steel lines, like brake lines in cars, usually require very heavy-duty hydraulic flaring equipment or specific adapters for double flaring, as they require much higher pressure to deform without cracking.
Achieving Quality Flares: Tips for Success
A poor flare leads to leaks, wasted refrigerant, and callbacks. Achieving a perfect flare is a skill that takes practice, often involving much flaring practice before achieving job-site mastery.
Ensure Proper Tube Length Protrusion
This is the single most common point of failure. If the tube sticks out too far, the resulting flare might look too big, or the thin edge may crack. If it doesn’t stick out far enough, the cone cannot fully form the sealing edge. Always refer to your tool’s manual for the exact protrusion needed for the size you are flaring.
Keep the Flaring Cone Clean
Metal shavings or debris on the cone surface can scratch the inside of the flare. These scratches become leak paths. Wipe the cone down before every few uses.
Tighten Smoothly and Evenly
Rushing the tightening process can cause the metal to tear rather than stretch evenly. Turn the screw slowly, feeling for resistance. For a single flaring operation, stop turning as soon as the metal forms a solid, defined edge. For double flaring, you stop after the first stage, back the tool off, adjust it, and then perform the second, final squeeze.
Use the Correct Nut
Always use the flare nut designed for the system. Refrigeration lines use specific flares (often 45 degrees in North America, though some European systems use 37 degrees, which requires a different flaring die). Using the wrong flare angle means the nut will never seat correctly against the mating surface, regardless of how tightly it is torqued with the flare nut wrench.
Flaring vs. Other Connection Methods
It is helpful to see where flaring fits in when compared to other ways to join pipes.
| Connection Method | Primary Use Case | Key Advantage | Key Disadvantage |
|---|---|---|---|
| Flaring | Refrigerant lines, high-pressure gas/liquid lines. | Excellent mechanical seal; reusable. | Requires specialized tools; tubing must be soft metal. |
| Soldering/Brazing | Copper water lines, general HVAC joints. | Very strong, permanent seal. | Requires heat; not reusable without re-brazing. |
| Compression Fittings | Small diameter lines, low-pressure water. | Easy to install; no heat needed. | Seal relies on a soft ring; prone to loosening under vibration. |
| Welding | Thick steel pipes (e.g., industrial steam). | Highest structural integrity. | Requires high heat and skilled welder; completely permanent. |
Specialized Tools in the HVAC Trade
In the world of HVAC, technicians often need more than just a flaring tool. They also use tools for related tasks, such as preparing tubes for installation.
Tube Expanding
When installing new sections of refrigerant line, sometimes a technician needs to connect a larger diameter pipe to a smaller one without making a compression joint or using a specialized fitting. This is where tube expanding comes in. An expander tool widens the end of the smaller tube just enough so that the larger tube can slip over it. This prepared end can then be brazed or soldered, creating a smooth transition. While flaring creates a seal on the outside, expansion prepares the inside for joining.
Working with Soft Tubing
Flaring tools are designed for soft metals because the pressure needed to flare them is relatively low and controlled. If you tried to use a standard flaring tool on hard steel, the tool itself might break, or the tube would crack instead of deforming smoothly. This is why choosing the right tool for the right metal is key when selecting refrigeration tools.
Safety Considerations When Using Flaring Tools
Working with pressurized systems, even during the setup phase, demands safety awareness.
- Eye Protection: Always wear safety glasses. Metal shavings can fly when reaming or flaring.
- No Power Tools: Never try to speed up a hand flaring tool with a power drill or impact driver unless the tool is specifically rated for power use. Over-tightening instantly can shatter the tube end.
- Check Pressure Rating: Before charging a system, always confirm that the flare connections you made are rated for the system’s operating pressure. Double flaring is generally required for higher-pressure refrigerants.
Flaring Tools and System Maintenance
When servicing an existing HVAC unit, you might need to disconnect lines to access components like the compressor or a drier.
If you disconnect a line that uses flares, you must inspect the flare face when reconnecting. If the flare is scratched, dented, or cracked, you cannot reuse it. You must cut the old flare off, prepare the tube again, and make a brand-new flare. Trying to reuse a damaged flare is a guaranteed way to cause a slow, hard-to-find leak. Proper maintenance of your tools ensures that when you need to make a quick repair using flaring practice techniques learned long ago, the new flare seals perfectly the first time.
Frequently Asked Questions (FAQ)
Can I flare PVC or rigid plastic pipe?
No. Flaring tools are designed for soft, malleable metals like copper and brass. PVC and other plastics will crack or shatter under the high localized pressure applied by a flaring cone. Plastic pipes use solvent cement for joining, not mechanical flares.
What is the difference between a 45-degree and a 37-degree flare?
The angle determines the cone shape. 45-degree flares are the standard for most common HVAC and household refrigeration systems in the US. 37-degree flares (sometimes called SAE flares) are used in specific automotive or aerospace applications. Using the wrong angle prevents the mating surfaces from meeting squarely, guaranteeing a leak.
Do I need different tools for single flaring versus double flaring?
Yes. While some universal tool kits allow you to create both, a double flaring operation typically requires a second specialized die or a repositioning of the tube within the clamp block after the initial setup. The tool must specifically support the mechanics needed to roll the metal back into that second, stronger lip.
How tight should I make the flare nut?
Use the correct flare nut wrench and tighten firmly until you feel significant resistance, usually followed by a slight “give” as the metal seats perfectly. Over-tightening is dangerous as it can deform the nut or crack the soft tubing neck. If you are unsure, always consult the manufacturer’s torque specifications for the fittings you are using.
Is flaring the same as swaging a tube?
No. Flaring creates a bell shape on the outside of the tube end to seal against a fitting. Swaging, which often uses a tool similar to a tube expanding tool, widens the inside diameter of a tube end so that another tube of the same size can slide inside it for brazing or soldering.